Ghost on Kubernetes (via Bitnami)

With the move away from the Bitnami repository and Broadcom choosing to halt the unauthenticated and free use of their image repository, you might find yourself at a bit of a loss as to what to do next. Rest assured, you've got two options: 1, you can scream at people on the Internet and exclaim at just how poorly Broadcom has handled this along with their butchering of VMWare/vSphere/ESXi (and I don't blame you).
Or 2, make some adjustments to the existing Helm charts and get Ghost at least started, that way you can begin migrations over to a better repository or do it yourself.
With today's guide, we'll be using Rancher to find our Ghost chart in the Bitnami repository. I'll provide kubectl commands as well to ensure those without Web UI abilities can follow along.
Adding the Bitnami Repo
First, install the Bitnami repository if you have not already. With Kubectl, it's as simple as helm repo add bitnami https://charts.bitnami.com/bitnami. For Rancher, ensure you're logged in and head to Apps > Repositories.
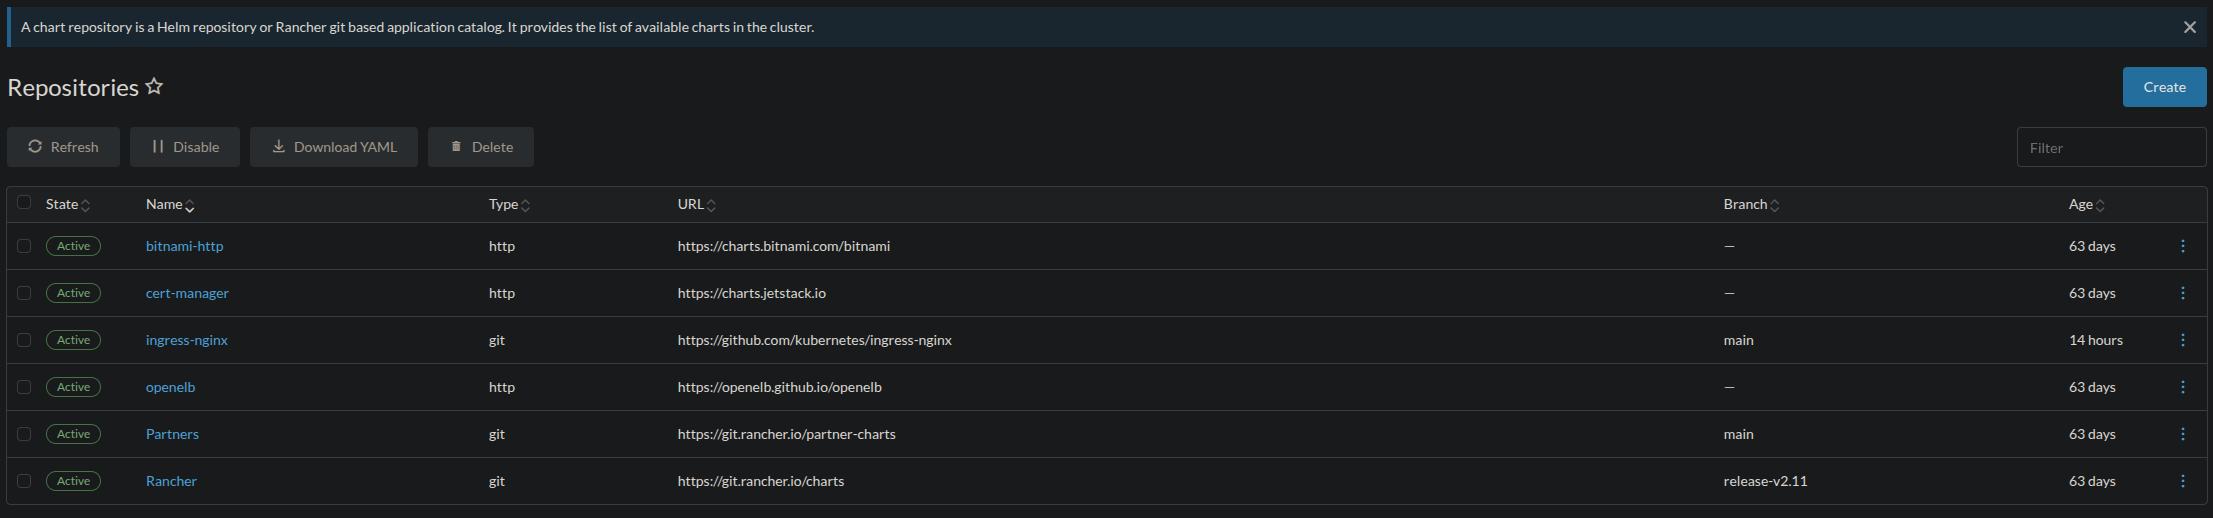
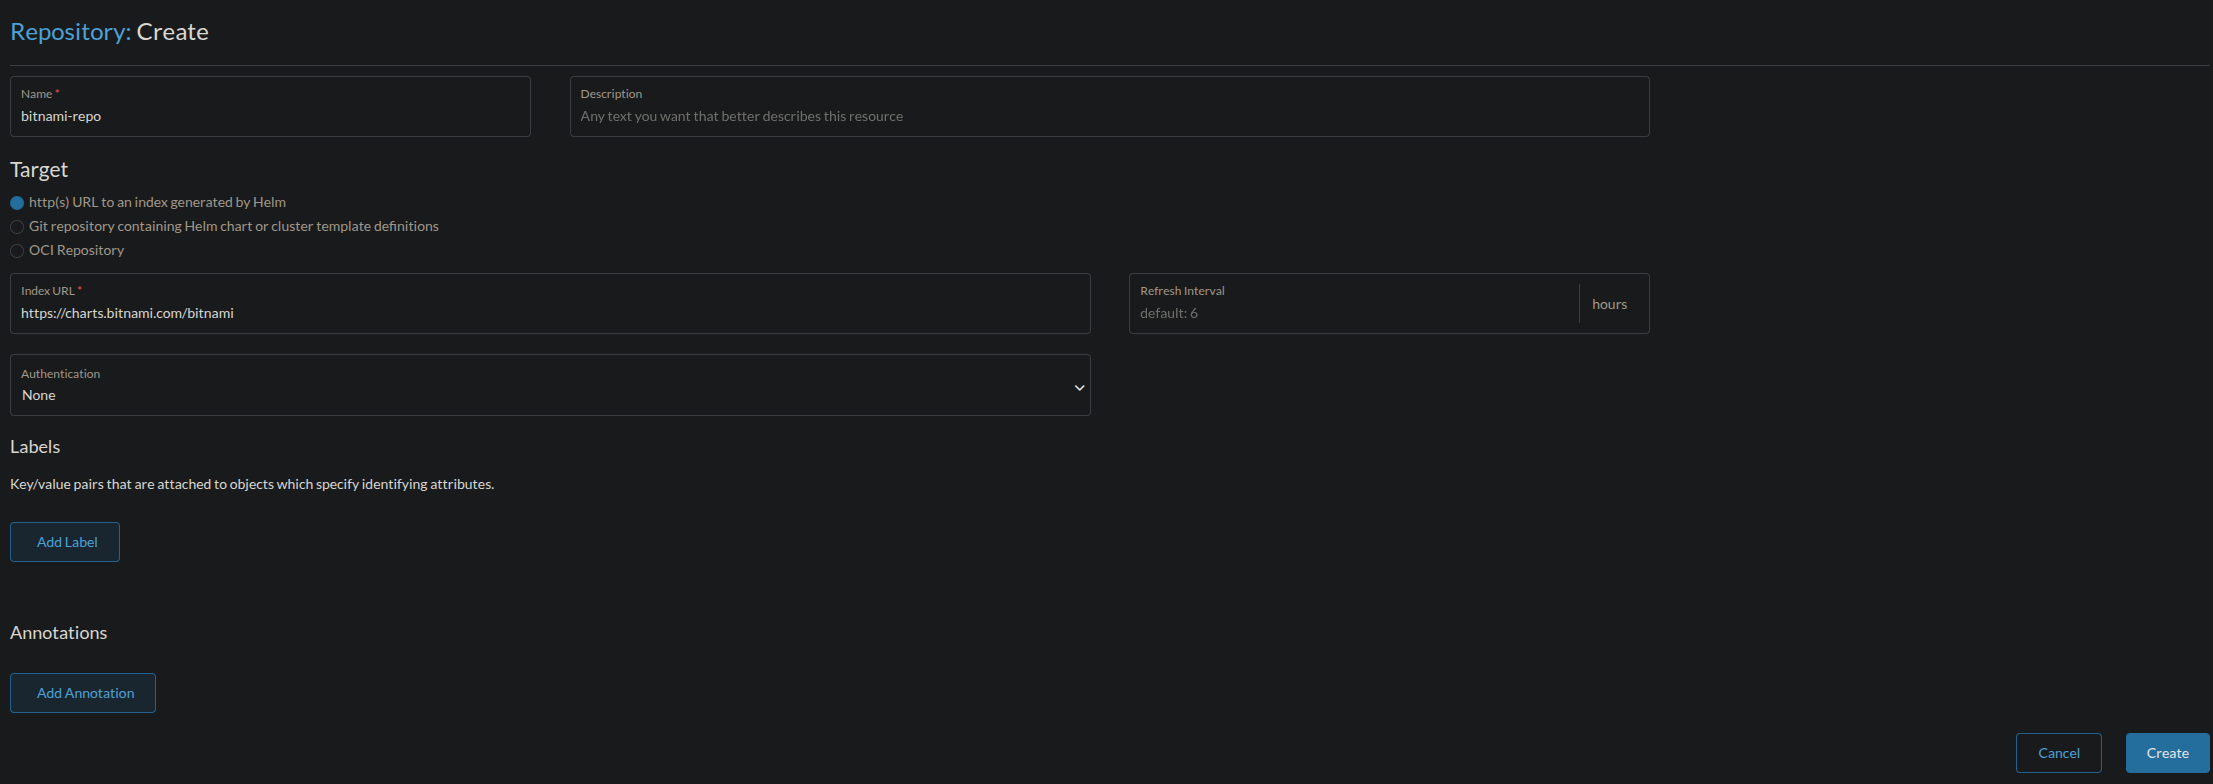
Once here, click Create. Name your repo whatever you like, setting the Target to "http(s) URL to an index generated by Helm". The same URL earlier at https://charts.bitnami.com/bitnami should be placed in the Index URL. Once complete, click Create.
Installing Ghost
Next, we're going to want to install and setup Ghost. Before you do so however - you must ensure that either A) you have an available MariaDB or MySQL server to connect to or B) you have available computational resources for both Ghost and a new MySQL server. Without enough resources, you may run into OOM events where either your site, database server, or other pods running are killed due to a lack of memory.
Additionally, ensure that you have a values.yaml file on hand. This will note how you wish to configure Ghost. Below will be an example values.yaml you can use to spin up your own instance:
affinity: {}
allowEmptyPassword: false
args: []
automountServiceAccountToken: false
clusterDomain: YourClusterDomainHere.local
command: []
commonAnnotations: {}
commonLabels: {}
containerPorts:
  http: 2368
  https: 2368
containerSecurityContext:
  allowPrivilegeEscalation: false
  capabilities:
    drop:
      - ALL
  enabled: true
  privileged: false
  readOnlyRootFilesystem: true
  runAsGroup: 1001
  runAsNonRoot: true
  runAsUser: 1001
  seLinuxOptions: {}
  seccompProfile:
    type: RuntimeDefault
customLivenessProbe: {}
customReadinessProbe: {}
diagnosticMode:
  args:
    - infinity
  command:
    - sleep
  enabled: false
existingSecret: ''

externalDatabase:
  database: externalDatabaseSchemaName
  existingSecret: ''
  host: externalDatabaseIPorHostname
  password: externalDatabaseUserPassword
  port: 3306
  ssl: false
  sslCaFile: ''
  user: externalDatabaseUserName

extraContainerPorts: []
extraDeploy: []
extraEnvVars: []
extraEnvVarsCM: ''
extraEnvVarsSecret: ''
extraVolumeMounts: []
extraVolumes: []
fullnameOverride: ''

ghostBlogTitle: MyGhostInstance
ghostEmail: admin@mysite.com
ghostEnableHttps: false
ghostHost: 'mysite.com'
ghostPassword: YourAdministratorPasswordHere
ghostPath: /
ghostSkipInstall: false
ghostUsername: YourAdministratorUsernameHere

global:
  compatibility:
    openshift:
      adaptSecurityContext: auto
  defaultStorageClass: ''
  imagePullSecrets: []
  imageRegistry: ''
  security:
    allowInsecureImages: true
  cattle:
    systemProjectId: p-zb9nq
hostAliases: []
image:
  debug: false
  digest: ''
  pullPolicy: IfNotPresent
  pullSecrets: []
  registry: docker.io
  repository: bitnamilegacy/ghost
  tag: 5.129.1-debian-12-r1
ingress:
  annotations:
    cert-manager.io/cluster-issuer: letsencrypt-issuer-selector-here
  apiVersion: ''
  enabled: false
  extraHosts: []
  extraPaths: []
  extraRules: []
  extraTls: []
  hostname: mysite.com
  ingressClassName: INGRESSCLASS
  path: /
  pathType: ImplementationSpecific
  secrets: []
  selfSigned: false
  tls: true
initContainers: []
kubeVersion: ''
lifecycleHooks: {}
livenessProbe:
  enabled: true
  failureThreshold: 6
  initialDelaySeconds: 120
  periodSeconds: 10
  successThreshold: 1
  timeoutSeconds: 5

mysql:
  architecture: standalone
  auth:
    database: bitnami_ghost
    existingSecret: ''
    password: ''
    rootPassword: ''
    username: bn_ghost
  enabled: false
  primary:
    persistence:
      accessModes:
        - ReadWriteOnce
      enabled: true
      size: 8Gi
      storageClass: ''
    resources: {}
    resourcesPreset: small

nameOverride: ''
networkPolicy:
  allowExternal: true
  allowExternalEgress: true
  enabled: true
  extraEgress: []
  extraIngress: []
  ingressNSMatchLabels: {}
  ingressNSPodMatchLabels: {}
nodeAffinityPreset:
  key: ''
  type: ''
  values: []
nodeSelector: {}
pdb:
  create: true
  maxUnavailable: ''
  minAvailable: ''
persistence:
  accessModes:
    - ReadWriteOnce
  annotations: {}
  enabled: true
  existingClaim: ''
  size: 8Gi
  storageClass: ''
  subPath: ''
podAffinityPreset: ''
podAnnotations: {}
podAntiAffinityPreset: soft
podLabels: {}
podSecurityContext:
  enabled: true
  fsGroup: 1001
  fsGroupChangePolicy: Always
  supplementalGroups: []
  sysctls: []
priorityClassName: ''
readinessProbe:
  enabled: true
  failureThreshold: 6
  initialDelaySeconds: 30
  periodSeconds: 5
  successThreshold: 1
  timeoutSeconds: 3
replicaCount: 1
resources: {}
resourcesPreset: micro
schedulerName: ''
service:
  annotations: {}
  clusterIP: ''
  externalTrafficPolicy: Cluster
  extraPorts: []
  loadBalancerIP: ''
  loadBalancerSourceRanges: []
  nodePorts:
    http: ''
    https: ''
  ports:
    http: 80
    https: 443
  sessionAffinity: None
  sessionAffinityConfig: {}
  type: ClusterIP
serviceAccount:
  annotations: {}
  automountServiceAccountToken: false
  create: true
  name: ''
sidecars: []
smtpExistingSecret: ''
smtpHost: ''
smtpPassword: ''
smtpPort: ''
smtpProtocol: ''
smtpService: ''
smtpUser: ''
startupProbe:
  enabled: false
  failureThreshold: 6
  initialDelaySeconds: 120
  periodSeconds: 10
  successThreshold: 1
  timeoutSeconds: 5
tolerations: []
topologySpreadConstraints: []
updateStrategy:
  type: RollingUpdate
usePasswordFiles: true
volumePermissions:
  enabled: false
  image:
    digest: ''
    pullPolicy: IfNotPresent
    pullSecrets: []
    registry: docker.io
    repository: bitnamilegacy/os-shell
    tag: 12-debian-12-r51
  resources: {}
  resourcesPreset: none
  securityContext:
    runAsUser: 0
    seLinuxOptions: {}
Now under no case is this values.yaml file a "hardened" Ghost install. It should not be treated as such. As with all software - adjust your settings to your environment, use secure passwords, and do NOT expose ports/services you do not need to! There's no reason for your SSH port to be exposed to the internet, put that on a VPN you own!
Important Note 2: Bitnami no longer hosts about 99% of previous images with bitnami/. I think it's ridiculous that they didn't just keep it as is and move the others, but hey, I don't work for Broadcom. See our image snippet:
image:
  debug: false
  digest: ''
  pullPolicy: IfNotPresent
  pullSecrets: []
  registry: docker.io
  repository: bitnamilegacy/ghost
  tag: 5.129.1-debian-12-r1
Now, let's dive in to the real stuff and see what should be configured. First, externalDatabase:
externalDatabase:
  database: externalDatabaseSchemaName
  existingSecret: ''
  host: externalDatabaseIPorHostname
  password: externalDatabaseUserPassword
  port: 3306
  ssl: false
  sslCaFile: ''
  user: externalDatabaseUserName
If you have an external database setup available for Ghost, use it here. Otherwise, you can remove this option from your values.yaml. If you'd like explicit permissions for your user to the schema, see the following for what you'll need:
- SELECT: This one is obvious, Ghost will need to run SELECT to retrieve data from your schema
- INSERT: How it'll store new data to your schema.
- UPDATE: When updating posts or other objects that are already existing, Ghost needs to UPDATE them.
- DELETE: For dropping posts, comments, pages, and more.
- CREATE: Ghost will create it's needed tables on first startup.
- ALTER: Modification of table structures upon startup, updates, and more of Ghost.
- INDEX: Now we wouldn't want 5 second queries on our database for Ghost, now would we?
Use the following SQL to grant these permissions: GRANT SELECT, INSERT, UPDATE, DELETE, CREATE, ALTER, INDEX ON `GHOSTSCHEMA`.* TO `GHOSTSQLUSER`;
ghostBlogTitle: MyGhostInstance
ghostEmail: admin@mysite.com
ghostEnableHttps: false
ghostHost: 'mysite.com'
ghostPassword: YourAdministratorPasswordHere
ghostPath: /
ghostSkipInstall: false
ghostUsername: YourAdministratorUsernameHere
Here, you'll want to configure your settings to the blog you wish. Title is your blog title, email is the administrator email you'll use to sign in, etc. Ensure that EnableHttps is off if you're using a reverse proxy and SkipInstall is false (since this is the first time your Ghost CMS should be starting, it needs to stay false.)
mysql:
  architecture: standalone
  auth:
    database: bitnami_ghost
    existingSecret: ''
    password: ''
    rootPassword: ''
    username: bn_ghost
  enabled: false
  primary:
    persistence:
      accessModes:
        - ReadWriteOnce
      enabled: true
      size: 8Gi
      storageClass: ''
    resources: {}
    resourcesPreset: small
Here is where you'll want to set anything up for provisioning a new MySQL server. If you have no need to do so, keep it false. Otherwise, setup a Storage Class, database authentication, and anything else your binary heart desires.
ingress:
  annotations:
    cert-manager.io/cluster-issuer: letsencrypt-issuer-selector-here
  apiVersion: ''
  enabled: false
  extraHosts: []
  extraPaths: []
  extraRules: []
  extraTls: []
  hostname: mysite.com
  ingressClassName: INGRESSCLASS
  path: /
  pathType: ImplementationSpecific
  secrets: []
  selfSigned: false
  tls: true
Finally, if you have cert-manager and Lets Encrypt, this is an excellent time to set up your domain back to Ghost (and enable it!). I personally use Lets Encrypt with NGINX as our reverse proxy and ingress controller, so if you have a similar configuration it may look like this:
ingress:
  annotations:
    cert-manager.io/cluster-issuer: letsencrypt-prod-nginx
  apiVersion: ''
  enabled: true
  extraHosts: []
  extraPaths: []
  extraRules: []
  extraTls: []
  hostname: yeehawitsjake.com
  ingressClassName: nginx
  path: /
  pathType: ImplementationSpecific
  secrets: []
  selfSigned: false
  tls: true
Once ready, complete the following (depending on your setup strategy):
- Rancher: Head to Charts, ensure that your Bitnami repo is selected, then search for "Ghost". Click Ghost, top right is "Install". Select an available namespace (you should be keeping everything in its own namespace!), set a name, then click Next. From there, you'll be given a view of your values.yaml where you can copy/paste your adjusted values.
- CLI:
helm install blog <bitnami-repo-name>/ghost --namespace <ghost-namespace> --create-namespace -f values.yaml- Note your Bitnami repo name as well as the namespace you wish to place Ghost in.
Once set, your deployment may take some time. I've seen a pretty quick response where our first cluster runs on a ThreadRipper/R740 two-node cluster, but in our failover cluster in another datacenter, it takes upwards of 6 minutes to copy over the files when starting. Once active, head over to the admin panel and get started!